Table of Contents
As we age, we need to be more mindful of our joint health. This guide to joint health has been prepared to help you protect your joints. These guidelines are a part of my Health Guides series.
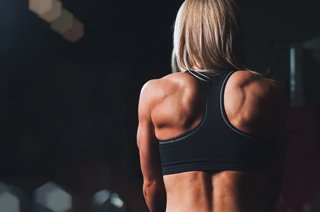
Joint Health
In this Joint Health guide, I cover important tips that keep your joints safe. Despite strength training, and a lot of people know that strength training is important for keeping their joints protected, there’s a lot of people that strength train without regard to their joints.
When I watch my son train, and when I go to the gym and I see people under the age of 50 train, they’re usually able to get away with things that they won’t get away with later on.
In this guide, I have a special feature from Marjorie, whose specialty is shoulders. She has done several blogs on shoulder health and specific exercises for the health of your shoulder.
I highly recommend that you go through this guide. See if there’s things that you might be doing that might put your joints at jeopardy. Think about things that you currently aren’t doing that you might want to supplement your programs with. But remember that in order to keep a healthy body, your joints are really critical.
Hypermobility and Joint Health
The following are the important articles you should read on how to protect your joints if you have hypermobility syndrome.
Shoulder Joints and the Tricep Dips
I published a blog post on how to safely do the tricep dip and protect your shoulder joint.
Shoulder Alignment and Yoga
A reader recently contacted me and asked how to make sure that her shoulder alignment is safe when in certain yoga poses.
Here is her question:
I’ve been following your work and wanted to ask a shoulder alignment question that I’m confused about. Specifically, it is about the shoulder action, placement and language when in certain yoga poses like downward dog or crescent lunge.
Often, when I do certain yoga poses, the shoulders get crunched up towards the jaw, tightening everything around the neck.
I thought the the general instruction was to ‘slide the shoulders down your back, and firmly on the back of the rib cage’, but recently I read conflicting thoughts.
There is no need to cue our students to “Pull your shoulders down your back” when their arms are overhead.
When our arms lift up, our shoulder blades naturally rotate and lift along with the arm movement. This is a normal, optimal movement that is often referred to as “scapulohumeral rhythm” and it is not helpful to interfere with this natural coordinated action by trying to consciously pull the shoulder blades down the back to prevent them from lifting.
Could you share with me your thoughts on shoulder alignment as they relate to yoga poses? Thank you.
Yoga Pose and Shoulder Alignment
Nicole’s question was about shoulder alignment and specifically, scapular position, when doing yoga poses.

Confusion About Yoga and Shoulder Alignment
She got confused with reading something within the Yoga International articles.
This was quoted from Yoga International, which is correct, that states: “There is no need to cue our students to pull your shoulder blades down and back when the arms are overhead.”
Natural Shoulder Lift
You’ve seen that guidance in Marjorie’s blog (below) on shoulder anatomy.
When our arms lift up, our shoulder blades lift up and naturally rotate and lift along with the arm and that’s a great and beautiful thing that happens.
This is a normal optimum movement that is often referred to as scapulohumeral rhythm — the movement of the scapula and the humerus.
It’s not helpful to interfere with this natural, coordinated action, by trying to consciously pull the shoulder blades down and back to prevent them from lifting.
I totally agree with all of that but I can understand Nichole’s confusion when doing a pose that requires our arms to be up overhead such as the downward dog.
Downward Dog and Shoulder Alignment
So as you see in the downward dog, you want the arms to press firmly into the mat so that the scapula are supporting the back. You don’t, at that point, want the shoulders to be coming up by the ears.
The difference is that it’s a closed kinetic chain. This means that your hands are in contact with the floor and your arms are now supporting the weight of your upper body.
This is very different than when you are simply raising the arms up overhead and where there’s no weight taken by the upper body. At that point, the scapula get to freely move up and around, and your shoulders come up towards your ears.
In weight bearing loads, you’re pressing the floor away from you and setting the shoulder blades in a more stable and strong position to support you.
Keep Your Shoulders Safe
Nichole and all other yoga practitioners out there, I hope this helps you in safely practicing your yoga and keeping your shoulders safe.
Stair Climbing
If your ability to climb stairs has been impaired or diminished, today’s blog topic is all about the easy steps to stair climbing. What is it you need to do to get back and feel safe climbing stairs again.
Hi, I’m Margaret at MelioGuide, and today I have a tip for how to improve stair performance.
A lot of my clients have either moved into bungalows or their own retirement homes, or they just simply haven’t done stairs in a heck of a long time.
They’re faced with either going to visit family, they have appointments that require stairs, or they live in condominiums, and there, the only stairs that they face, technically, are the little sidewalks or when they’re going into a building.

Stair Climbing as You Age
These are big issues for them because they haven’t done an eight-inch step in a while, and it’s giving them knee pain and hip pain.
Today’s blog is all about how to get back to doing steps where you can feel safe and successful, and strong enough to do these stairs.
How to Improve Your Stair Climbing
The easiest way would be, one, to start with a smaller step.
Now I happen to have a more official stepper, but you don’t need to have any type of official stepper if you have simply something that’s four inches in height.
Whether you ask people for a couple of two-by-fours and you tape them together, you get a four-by-six, anything that, you know, pieces of wood, you have someone design something for you, build up a little step for you. But starting with a little four-inch step up and down, and up one, down two, you know, and so doing that.
Get comfortable and you build up to doing 3 sets of 10.
I highly recommend two things when you’re doing those step-ups:
- Your knee alignment should be pointing in the direction of your second toe, just like I talk about with the squats and with the lunges.
- You perform without pain.
If you are having pain, your joints are not going to appreciate it.
You might have to start with a smaller step, or seek the help of a medical professional.
Once you, however, get to your comfortable 3 sets of 10 with the four-inch step, you progress then to a six-inch step.
You repeat, and over time, it may take you several weeks to build up to your 3 sets of 10 with the six-inch step, then you progress to an eight-inch step.
You’ve got the pattern.
Stair Climbing in Water
Some of my clients are lucky enough to live in condominiums where there’s a pool.
They have stairs going down into the water, so sometimes they can actually start on the stairs that are in the water, and the buoyancy of the stairs, of the water, taking up their body weight will help them do the steps so they can actually start right away with a six-inch step or a seven-inch step that happens to be whatever’s in the water.
But, they’re starting with the water being at chest height, and then they progress to a higher step so that the water’s at hip height. Gradually, they’re taking more of their body weight on the step.
Either method works.
Whichever way would work best for you is what you should do. I hope this tip helps you in regaining your confidence and your function on stairs.
Shoulder Anatomy
Marjorie Gingras is a Montreal-based Physiotherapist who specializes on shoulder treatment and rehabilitation. In this blog, Marjorie presents shoulder anatomy and specifically the functional anatomy of the shoulder.
I was able to spend some time with Marjorie and we created this video (and a few others to follow) on shoulder health.
Marjorie describes the shoulder anatomy in detail and then demonstrates several shoulder motions that you should incorporate in your daily movements.
For many years, Marjorie trained as a ballet dancer and she discusses one of the ballet moves that can cause shoulder problems.
This same movement is used in everyday life and needs to be modified. Marjorie demonstrates how you should bring your shoulder up and around to make sure you do not compromise your shoulder health.
Hi everyone. My name is Marjorie, I’m a Physical Therapist passionate about shoulders, so here is a little bit about shoulder anatomy today, specifically the functional anatomy of the shoulder.

Shoulder Movement
This is a shoulder (which happens to be under the skin) and the big muscle of the neck and the back.
This is the shoulder blade which is against your rib cage.
This is the collar bone which is in front here.
And this is the bone of your arm, the humerus, that goes down, obviously, but that’s cut for the model, here.
The Collar Bone
The important thing to know about the shoulder is that the only link of all these systems with the rest of the skeleton is the collar bone to the sternum, which is not a big stability thing.
Everything of the rest of the motion of the shoulder is the muscle bringing the shoulder blade up, or down, or around, or in back.
The humerus is supposed to stay stable on this mobile surface.
You’re going to be able to see this is your humeral head. It’s supposed to stay the middle of this little surface there like a a golf ball on a tee. And the tee is moving.
Shoulder Anatomy and Movements
The important thing, the top priority in the shoulder, is that you keep the humeral head centered on the surface, whatever you do with your shoulder, with weight, without weight.
Normally when you bring your arm up like this in front, the shoulder blade’s supposed to go up and turn a little bit. Which is a really good idea because it’s going to keep the little surface under humeral head, keep everything aligned, and prevent from squeezing the tendons in your shoulder, which’s going to cause pain.
I spend all my days telling to my patients the importance of bringing your shoulder blade up, and around.
I’m going to show you a little bit on myself because I did ballet for 20 years.
In ballet we just learned to bring our arms up, and keeping the shoulder blades down and this is a big problem. Because when you do this, you bring your arm up, and you keep your shoulder blade down, and then you go there to squeezing, squeezing, squeezing, squeezing. And I did everything like this.
Now the best way to work your shoulder is that, you bring your arm up like this, and then you let the shoulder blade go up, all the way up.
Most of the time if you were a ballet dancer, a dancer, yoga, palates, they’re going to tell you to bring your shoulder blades down and keep them down.
I would say as a shoulder specialist, you have to bring you shoulder blades up while you move. If you’re go in your cupboards, if you comb your hair, don’t keep them down, let them go up.
And that’s it for today.
How to Self Massage with Foam Roller
I encourage many of my clients to use self massage to relax their muscles after a workout. It is popular with athletes because it is so effective.
However, I recommend a graduated approach to self massage — especially if you are new to the practice. In the video, I show how to start with a rolling pin (blanketed with towels) and eventually graduate to a foam roller.
Hi, I’m Margaret, MelioGuide, and today, I want to talk about self massage.
Self Massage with Foam Rollers
A lot of you have either seen on TV or are familiar from going to your gym: foam rollers.
Foam rollers are really popular as a tool for doing self massage.
But so often, I have clients that come in and go, “Oh yeah, I tried that, but way too painful.” And they just don’t go there.
So I want to talk about the transition going toward the foam roller, of optimizing the health of your muscles.
Self Massage for Your Quadriceps
The easiest muscle group to visualize this with — though you can still do this with any muscle group— are your quadriceps.
They’re given the name quadriceps because there are four muscles, the muscles of the thigh because we go up and down the stairs all the time, we get up and down from a chair.
They tend to get tight.
We spend a lot of time sitting. They get tight.
So if you have ever tried a foam roller, or you take your hand with the knuckles and you rub on your thigh, or if you have any knee pain, those are good indications that your quadriceps could do with some self massage.
Be Gentle to Begin With …
If you feel tenderness with any of those things, starting right on a foam roller is going to be quite uncomfortable for you.
I would highly recommend that you approach it in a gentler way for your body.
For many of my clients, that might mean taking a towel, if you need lots of padding between you and your rolling pin.
I don’t actually own a rolling pin, so this is kind of a sophisticated rolling pin.
You might just start rolling the muscles with your rolling pin and use as many towel layers as you need to get a nice pain. You know that kind of pain that you get when you go, “That feels good. That’s a nice sensation.”
… Then Increase the Intensity
With time, you can gradually reduce your towel layers from four to two to none, so that eventually, you’re using your rolling pin and going, “I’m actually feeling really good.”
You’re going to concentrate on the spots that are really tender. Those spots you’ll massage in one direction, so even though I’m going back and forth, the emphasis would be in one direction.
The intensity of the massage would be no more than a seven out of ten on a scale of pain. Again, you want this to feel like a nice pain.
Now Introduce Self Massage with Foam Rollers
When you’ve transitioned from using your towel to your rolling pins, and you feel like you’re ready to transition to your foam roller, even that might be too big a transition.
Going right to the foam roller with your body weight now on the foam roller, you might consider actually using a pillow between you and the foam roller.
I’m going to use this pillow here to demonstrate massaging my quadriceps.
Using the pillow between me and the foam roller, just adjusting here, I’m going to walk forward, keeping my spine nice and straight, walking on my forearms back and forth until I feel I’ve worked out all the spots.
This might take several days or weeks to do that, depending how frequently you do it, and then you’re gradually going from a thick pillow to maybe a folded yoga mat to then being able to actually use your foam roller.
I hope that helps you in transitioning to self massage using the foam roller. I will have another blog on all the uses of the foam roller, as well.
So thanks for tuning in. I’m Margaret from MelioGuide.